
How I Photograph Florida Storms

You might have seen me chasing the Florida storms in my livestreams recently, but how do you actually catch an epic lightning bolt without missing the moment or soaking your gear?
I’m breaking down the gear and exact manual settings I use to shoot Florida's wildest weather without a lightning trigger.
Rather watch this as a video? You're in luck! Click Here: How I Photograph Florida Storms.
All images and words by Paul Farace Photography
Paul Farace is an award winning Florida based landscape photographer and author with 20 years of experience, specializing in capturing the state's coastlines and waterways. Operating out of St. Augustine, he shares his expertise through fine art prints, adventure videos, educational workshops, and digital content. Explore his work and bio details at Paul Farace Photography. Some links on this page are affiliate links and I may earn a small commision if you click any. Thank you for the support if you do!
How to photograph Florida storms
Now you know I love the Yamper, my mini mobile adventure camper, but most of my best lightning photos are all from within 20 or 30 minutes from home. You just need to stay safe and dodge the storms! If you are in Florida, driving less than an hour is all you usually need to capture amazing storm photography and time-lapses.

Before we talk gear we need to quickly talk about safety. You should almost constantly be monitoring a radar app to track the storms as they move. You can also count the time between the lightning and thunder. Every 5 seconds is roughly 1 mile away. 30 seconds is around 6 miles and If it gets too close you should be taking shelter under a roof or inside a vehicle. No photo is worth your life.

Alright so what do you need to capture these storms? Your biggest benefit is a sturdy tripod. The winds that can and will come off these storms can shake your setup and cause blur in your foreground and lightning bolts.
Solid Budget Carbon Fiber Tripod - Amazon
Combine that with this long exposure time-lapse technique or use a lightning trigger. Let's go
over the pro's and con's of each really quick.

Techniques for capturing storms and lightning.
Long exposure time-lapse photography to capture storms
This is the method I that use to capture storms and lightning.
Pros
Cost effective: No extra gear needed usually because most modern cameras have a built in intervalometer. An external Intervalometer is pretty cheap too if you need to pick one up.
External Intervalometer (brand specific) - Amazon
Extra content: You get an epic Timelapse while capturing the entire sequence
No lag: your shutter is open so any strikes you usually catch the full branch of lightning.
Cons
Low light: Needs to be pretty dark out already or use heavy ND filters. But luckily these are the best times and looking storm shots, during dusk or dawn hours.
Missed strikes: If a strike happens during the second your shutter closes, you miss it.
Storage: you will shoot hundreds of frames so that can be a pain. Also processing a Timelapse is a bit of a pain too, but they are awesome so it’s worth it!
SD cards with faster write speeds ensure you properly save images during your 1 second interval as the time-lapse runs.
Sandisk SD Cards - Amazon

Using a lightning trigger to capture lightning storms
Here are the pros and cons of using a lightning trigger to capture bolts if you only want to focus on the lightning.
Pros
Shoot anytime: This is the most reliable way to shoot those daytime storms.
Save space: Your camera only fires when lightning occurs, saving you a LOT of storage and battery too.
Lower noise: Your sensor stays cool because it is not continuously running long exposures, which can introduce noise.
Cons
Lag: Sometimes there can be a slight delay that misses the initial bolt.
No creative shutter speeds: You won’t be blurring clouds, rain bands or water surface as the shutter speed is fast. But you can always blend the two later in post if you capture some long exposures while you are in the field.
Cost: They aren’t the cheapest piece of gear, look to spend around $3-500 for a good trigger. And don’t waste time with any cheap lightning triggers.
Check out the MIOPS Lightning Trigger (camera brand specific) - Amazon
TLDR
Use long exposures if you are shooting in lower light and want a smooth Timelapse video of the storms. No extra cost for the most part, my favorite!
Use a trigger if you want to shoot in brighter conditions, shoot lightning frequently and want less clutter on your storage cards. They are not cheap though!

How to capture storms & lightning with a long exposure Timelapse
Let's go over the technical parts and exactly how to capture these epic storms.

Camera Settings for storm time-lapse photography
First make sure you are in fully manual mode so you have full control over your settings.

Lets start out with your ISO and set it low
ISO 100 or your cameras lowest native ISO. This will keep your images as clean and noise free as possible. Essential for long exposure Timelapse’s due to heat build up.

Set your Aperture from f8 to f16.
Try to keep everything in your frame as sharp as possible with a higher aperture such as f8 to f16, and adjust this range to also help get your shutter speed ideal. Try not to go over f16 to avoid lens diffraction which can cause soft images.

Shutter speed - Anywhere from 2 all the way to 30 seconds. Generally the longer the better as long as the wind isn’t blurring your foreground too badly.
As the light changes adjust your shutter speed, but try to always stay over 2 seconds to give your self the best chance of catching a bolt.
Use an ND filter if it’s still too bright outside. I almost never go past f16 to avoid lens diffraction and don’t drop below 2 second shutter whenever possible to maximize your chances of catching the lightning bolts.
My ND Filter - Amazon
My circular polarizer - Amazon
Intervalometer settings for storm time-lapse photography
Now lets set up the interval. Most modern cameras have a built in intervalometer.
If you don’t have one built in you can get an external intervalometer cheap on Amazon.

First set your number of total shots.
I put mine high, to around 900, so it will continue to run for quite a while and I can control it manually with the shutter button. Press to start, press to stop.

Set the delayed start time. 5 seconds is what I use here.

Then set your interval to 1 second more than your shutter speed.
If you have a 5 second shutter speed set it to 6 Second intervals. A 10 second shutter speed, 11 second interval. You need one second in between shots to process and save the images as the time-lapse runs. Also 1 second is the shortest time you can set without a specialized intervalometer.
Then just make sure it is turned on and you are good to go!
Press start to begin the sequence. It will run until the number of shots set is reached or you press the shutter again to stop it.
It's really that simple! Then it's just a matter of positioning, timing and a lot of luck!
Where do you focus to capture crips lightning images?
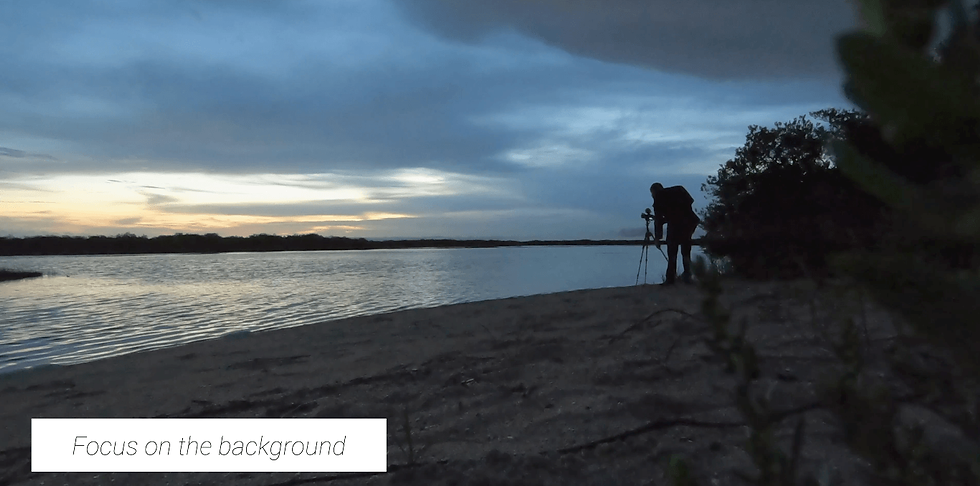
Focus on the background or horizon. Or set your lens to proper infinity. This allows the main subject, the storm and any lightning to be as sharp as possible.
If you have a very interesting closer foreground take photos of that separately before the time lapse to blend later. This can be great if you focus stack and really interesting foreground and then combine it with a lightning frame in post.

11 Storm Photography Field Tips
Leave extra early - always go little earlier than you think. I can't tell you how many times I thought i was early only to miss the main front passing through my best locations.
Use manual focus in low light - Auto focus can struggle so to ensure you have pin sharp photos switch to manual focus, punch into the horizon and dial it in perfect. Then lock your focus down.
Use interesting foreground - It's easy to just point your camera towards the storm and go, but try to take a moment to find an interesting foreground and composition. A palm tree silhouette, summer crop rows on the farm, long exposure water use whatever you have available to make your photos that bit more interesting and stand out.
Keep lens cloths ready - Almost your full time job while the time-lapse runs is keeping the lens and filters clean from rain drops, humidity and mist.
Use your lens hood - Usually best for sun and glare, but great to help stop some of the rain from leaching the lens.
Shoot in RAW - Shoot in RAW to allow the best image quality. You are often shooting in low light or high dynamic range scenes. Using the RAW format will improve your final image quality and ability to edit in a huge way.
f11 for a sweet spot - If you have to pick one aperture go with f11 to allow for maximum depth of field, but also a still very crisp image.
Wide angle and telephoto - Use a wide angle to capture those huge Florida shelf clouds and use your telephoto to zoom in on epic sections of storm and lightning activity.
Protect your camera - Bring a small towel or even better an absorbent cloth to protect your camera. Lay it over the top, but out of the way of your lens to ensure you keep the most water out.
Cars & Headlights - Be careful of any car headlights passing by in low light. They can blow out your foreground and ruin images. Or use them creatively in a long exposure as streaks or to paint your foreground as they pass by.
Storm exit plan - Always have your storm exit plan in mid. Know where you can go to safely get out of any trouble. Things can change fast so always keep safety on the top of your mind.

Which part of storm photography do you find the most difficult? Timing the storms, the right settings? Let me know in the comments!
And thanks for reading! - Paul Farace Photography
Here are some articles to check out next:
---------------------------------------
Check out my THIS IS FLORIDA! series on YouTube where I am exploring the full length of Florida's A1A in search of the best landscape photography spots.
Some links on this page are affiliate links and I may earn a small commission if you use any to buy. An easy way to support me for free! Thank you!
My Stuff
My Website: https://www.paulfaracephotography.com/
100+ Ideas for Landscape Photographers Book: https://amzn.to/4cinISm
How to Extreme Focus Stack Ebook: https://amzn.to/48wEgon
North East Florida Guide: https://www.paulfaracephotography.com/florida-photo-guide
Marineland Seascape 1on1 Guide: https://www.paulfaracephotography.com/marineland
My Gear
My cameras: https://amzn.to/4vgrOTL
My wide angle lens: https://amzn.to/3QfoRTf
My mid range lens: https://amzn.to/4sV4U2y
My telephoto lens: https://amzn.to/48bU687
My drone: https://amzn.to/3PVgdt7
My action cam: https://amzn.to/4t2Knck
My microphones: https://amzn.to/4dE4n0a
My ND filter: https://amzn.to/4c2cLWe
My circular polarizer: https://amzn.to/41XllQ0

Comments